
Table of Contents
- how to use glue traps for bed bugs: Understanding Their Role in Integrated Pest Management
- why this pest appears in homes
- signs of infestation
- how to use glue traps for bed bugs – Placement Strategies for Maximum Capture
- how to use glue traps for bed bugs safely and effectively
- natural removal methods
- chemical / product treatment
- method comparison
- common mistakes homeowners make
- prevention (long‑term control)
- when to call a professional
- frequently asked questions
- Can glue traps eliminate a bed‑bug infestation on their own?
- How often should I replace glue traps?
- Are there any health risks associated with using glue traps?
- Do bed bugs develop resistance to glue traps?
- What should I do with a trap that has captured bed bugs?
- Trending posts:
- Can You Use Essential Oils to Get Rid of Spiders? A Practical Guide
- Effective Bed Bug Treatment: A Homeowner’s Guide
- Commercial Pest Control: Expert Strategies for Businesses
- Do Bed Bugs Bite Dogs? What Every Owner Should Know
- How to Remove a Yellow Jacket Nest Safely and Effectively
- How to Get Rid of Ants – Proven Home Strategies
Imagine slipping into bed after a long day, only to feel a faint, itchy bite on your arm. A quick inspection reveals tiny reddish‑brown specks on the mattress seams – you’ve just discovered a bed‑bug problem. The anxiety that follows is real: you want a solution that’s quick, affordable, and safe for your family and pets. Many homeowners turn to chemical sprays, but there’s a quieter, often overlooked tool that can give you valuable information and even reduce numbers: glue traps.
Glue traps are simple sticky pads that capture insects that walk over them. While they’re famous for monitoring cockroaches and rodents, they can also play a useful role in a bed‑bug control plan. Understanding how to use glue traps for bed bugs correctly can help you confirm an infestation, pinpoint hot spots, and evaluate the success of other treatments you’re applying.
In this guide, I’ll walk you through the science behind bed bugs, the reasons they invade homes, and the step‑by‑step process of deploying glue traps effectively. You’ll also learn how these traps fit into a broader Integrated Pest Management (IPM) strategy, what mistakes to avoid, and when it’s time to bring in a professional.
how to use glue traps for bed bugs: Understanding Their Role in Integrated Pest Management
Bed‑bug control is rarely a “one‑and‑done” affair. Because these insects hide in tiny cracks, travel in luggage, and can survive for months without feeding, a layered approach works best. Glue traps serve two main purposes in an IPM program:
- Monitoring: By placing traps in strategic locations, you can confirm the presence of bed bugs and track their activity over time.
- Physical Reduction: Though not a stand‑alone solution, sticky traps can catch wandering nymphs and adults, especially in heavily infested rooms.
When you know exactly where the bugs are moving, you can focus heat treatments, steam, or pesticide applications where they’ll have the greatest impact.
why this pest appears in homes
Bed bugs (Cimex lectularius) have adapted remarkably well to modern living. Here are the most common reasons they end up in your house:
- Travel: They hitch rides in luggage, clothing, or used furniture.
- Second‑hand items: Acquiring used mattresses, sofas, or box springs can introduce a hidden colony.
- Multi‑unit buildings: Walls, electrical outlets, and shared plumbing provide easy pathways between apartments.
- Clutter: Piles of clothing, books, or cardboard create harborage sites where bed bugs can hide during the day.
Understanding these entry points helps you target prevention measures before the infestation spreads.
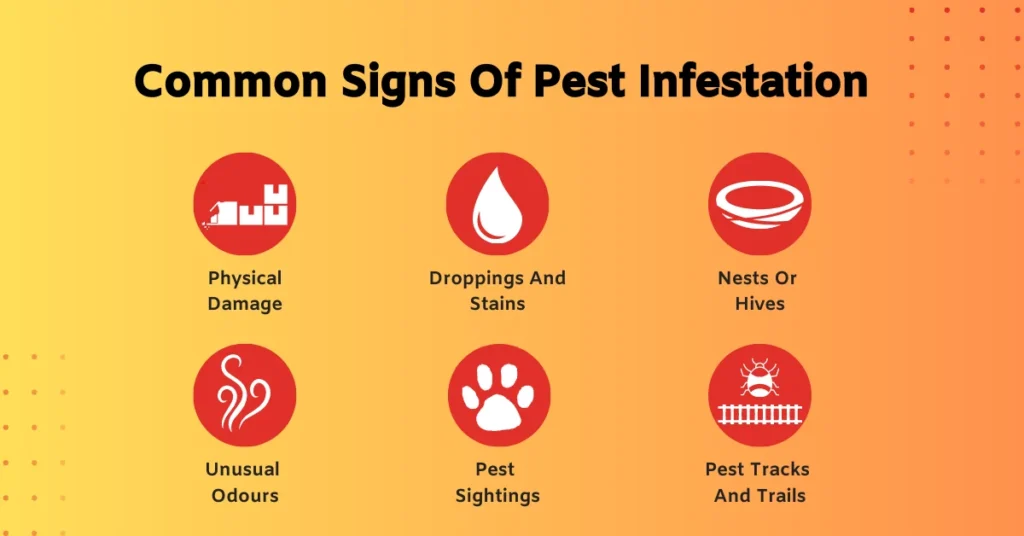
signs of infestation
Spotting the early warning signs can save you weeks of frustration. Look for the following:
- Small, rust‑colored spots (fecal stains) on sheets or mattress seams.
- Live bugs – about the size of an apple seed, reddish‑brown, and flattened after feeding.
- Shedded skins (exuviae) that appear as translucent shells.
- Blood‑stained pillowcases or a faint, sweet, musty odor.
- Increased bite marks on exposed skin, especially in a line or cluster.
If you notice any of these clues, set up glue traps immediately to verify activity.
how to use glue traps for bed bugs – Placement Strategies for Maximum Capture
Correct placement is the heart of successful monitoring. Follow these steps to ensure your traps are where the bugs travel:
how to use glue traps for bed bugs safely and effectively
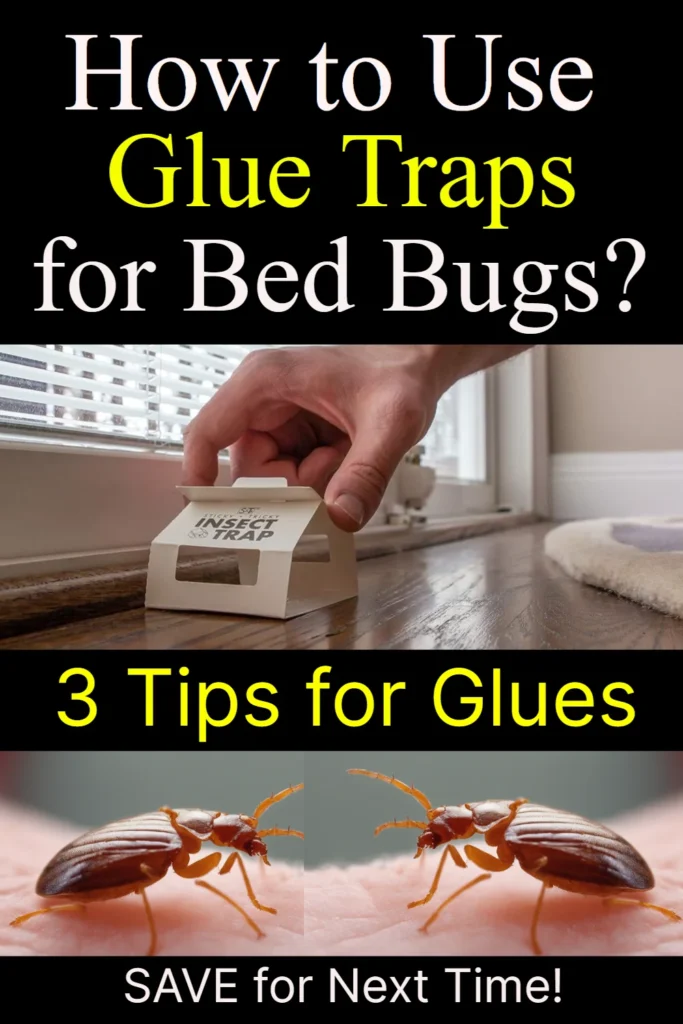
- Choose the right trap: Opt for a thin, low‑profile adhesive pad (often 4 × 4 inches) designed for insects. Some manufacturers label them “bed‑bug monitors.”
- Identify high‑traffic zones: Bed frames, headboards, and the underside of the mattress are prime spots. Also place traps near baseboard cracks, behind nightstands, and inside closet rods.
- Clean the surface: Wipe the area with a mild detergent and let it dry. Dust or oil can reduce the stickiness of the trap.
- Position the trap adhesive side up: Press it firmly onto the surface, ensuring no air bubbles.
- Label the trap: Write the placement date and location on the edge with a waterproof marker. This helps track movement over weeks.
- Leave for 7‑10 days: Bed bugs typically check their surroundings nightly. After a week, inspect the trap for captured insects.
- Record findings: Take photos or note the number and life stage (egg, nymph, adult). This data guides further treatment decisions.
For a visual reference, see our Bed Bug Treatment Beacon Square guide, which includes photos of correctly placed glue traps.
natural removal methods
Before reaching for chemicals, many homeowners try DIY approaches. Here’s what works, and where it falls short:
- Heat treatment: Bed bugs die at temperatures above 120 °F (49 °C). Use a portable steamer on mattresses, box springs, and furniture seams. Works best when combined with glue trap monitoring to confirm reduction.
- Cold exposure: Freezing items at 0 °F (‑18 °C) for at least four days can kill bugs. This is handy for clothing or small items but impractical for whole rooms.
- Vacuuming: A strong vacuum can capture active bugs and eggs. Empty the canister into a sealed bag and discard it promptly.
These methods are safe for families and pets, yet they rarely eradicate a full infestation on their own. That’s why how to use glue traps for bed bugs as part of a monitoring routine is essential – it shows you whether your natural tactics are making a dent.
chemical / product treatment
If DIY steps aren’t enough, targeted insecticides become necessary. Modern products often contain pyrethroids, neonicotinoids, or desiccant dusts like diatomaceous earth. Here’s what to keep in mind:
- Read the label: Ensure the product is approved for bed‑bug control on indoor surfaces.
- Apply to cracks and crevices: Spray into mattress seams, baseboard gaps, and behind headboards where bugs hide.
- Follow safety precautions: Wear gloves, keep children and pets out of the treated area for the recommended time.
- Avoid over‑application: Too much chemical can drive bugs deeper into hiding spots, making future detection harder.
After treatment, continue how to use glue traps for bed bugs to evaluate whether the insecticide reduced activity. If numbers stay high after a week, you may need a stronger approach or professional help.
method comparison
| Method | Speed | Effectiveness | Risk | Best For |
|---|---|---|---|---|
| Glue traps (monitoring only) | Slow – 7‑10 days per trap | Low‑moderate (captures wanderers) | None (non‑toxic) | Early detection & ongoing monitoring |
| Heat/Steam treatment | Fast – 1‑2 hours per room | High (kills all life stages) | Heat damage if not careful | Severe infestations, chemical‑sensitive homes |
| Chemical spray (pyrethroid) | Immediate | Moderate‑high (depends on resistance) | Potential toxicity, resistance issues | Established colonies with hidden harborages |
| Diatomaceous earth (dust) | Slow – 48‑72 hours | Moderate (drying effect) | Respiratory irritation if inhaled | Cracks, voids, and pet‑friendly environments |
common mistakes homeowners make
Even experienced DIYers can trip up. Here are the most frequent errors related to glue‑trap usage and overall bed‑bug control:
- Placing traps on soft surfaces: Fabric or carpet can reduce adhesive strength. Always attach traps to hard, clean surfaces.
- Ignoring trap data: Some people set traps and then discard them without reviewing captures. The information is vital for deciding next steps.
- Relying on traps alone for eradication: Glue traps capture only a fraction of the population. They must be paired with heat, chemicals, or professional services.
- Using the wrong adhesive type: Some “sticky notes” lack the tack needed for bed bugs. Invest in purpose‑made insect monitors.
- Skipping preparation: Failure to clean the placement area can make the trap ineffective.
prevention (long‑term control)
Once you’ve cleared the current infestation, preventing re‑introduction is the next challenge. Follow this checklist:
- Inspect and vacuum luggage after travel.
- Avoid picking up used mattresses or furniture without professional inspection.
- Seal cracks around baseboards, electrical outlets, and plumbing.
- Reduce clutter to limit hiding spots.
- Use encasements on mattresses and box springs.
- Maintain a quarterly schedule of glue trap monitoring in high‑risk rooms.
when to call a professional
Even the most diligent homeowner can reach a point where DIY methods stall. Consider professional help if you encounter any of these situations:
- Glue traps consistently capture multiple adults after two weeks of treatment.
- Infestation spreads to multiple rooms or levels.
- You have vulnerable occupants (young children, elderly, pets) and need chemical‑free solutions.
- Heat‑treatment equipment is unavailable or you lack confidence in safe usage.
A qualified pest‑management professional will combine thorough inspection, targeted heat or pesticide applications, and follow‑up monitoring – often using the same glue‑trap data you’ve been collecting.
frequently asked questions
Can glue traps eliminate a bed‑bug infestation on their own?
No. Glue traps are excellent for monitoring and catching some wandering bugs, but they cannot reach the hidden harborage areas where most of the population resides.
How often should I replace glue traps?
Replace them every 7‑10 days, or sooner if the adhesive becomes covered with dust or debris. Regular replacement ensures accurate monitoring.
Are there any health risks associated with using glue traps?
Glue traps are non‑toxic and pose no health risk to humans or pets when placed on inaccessible surfaces. However, avoid allowing pets to step on them as they can become stuck.
Do bed bugs develop resistance to glue traps?
Resistance is not an issue with sticky surfaces; it’s a physical barrier, not a chemical. The limitation is purely mechanical capture efficiency.
What should I do with a trap that has captured bed bugs?
Seal the trap in a plastic bag, label it, and dispose of it in an outdoor trash container. This prevents any live bugs from escaping.
By integrating glue traps into a broader IPM framework, you gain a low‑cost, low‑risk tool that informs every other step you take. Remember, the key to success is patience, thoroughness, and a willingness to adapt your tactics as the data from your traps tells you what the bugs are doing.
With diligent monitoring, proper placement, and complementary treatments, most homeowners can bring a bed‑bug problem under control without resorting to aggressive chemicals. Keep an eye on the traps, stay consistent with your prevention checklist, and don’t hesitate to reach out to a professional when the numbers stop dropping. Your sleep—and peace of mind—will thank you.